,i have created a soft/shell which contains some tutorial for samsung galaxy I9000.
,credits to the ff..
eyestrain
samsung-firmware.com
i-thinkbig.blogspot.com(d'odders)
www.gsmsandwich.com.ph
xda forum
,here's the screenshot..
,you can download the soft here.
Tuesday, December 21, 2010
Saturday, December 18, 2010
JAILBREAK REFERENCE SOFTWARE...
,i have created a soft that will serve as a reference in jailbreaking any iDevice (iPhone 4, 3GS, 3G, 2G and others) based on its version and model..
,below is the screenshot of the said soft...
,full credits to wwww.jailbreakmatrix.com from which i based the soft.
,download the soft here.
,below is the screenshot of the said soft...
,full credits to wwww.jailbreakmatrix.com from which i based the soft.
,download the soft here.
Sunday, December 12, 2010
iphone 3GS recovery only solution.....
,this phone came-in to the shop with a "recovery mode" only problem.
,the first thing that i do is to kick it out of recovery using tiny umbrella, result is the same.
,then i restore it using 4.1 firmware with my hosts file pointing to saurik server hoping that its shsh is saved, it came out with error 1604 (as seen from the image below), darn no saved shsh..
,then i try to restore it using 4.2.1 firmware, it came out with error 1015, and the result is still the same. hmmm...maybe this was unlocked before using the update baseband option..
,i check the logs and this is what is shows..
,so my speculation has been confirmed, the baseband has been updated to 6.15 that is why restoring to 4.2.1 ofw still gives me error.
,so to quote the dev team..
,so from the number 3 quote above, to solve the problem i need to restore to a custom 4.2.1.
,so here's what i did..
1. download the custom ipsw here.
2. open redsn0w 0.9.6b6.
3. browse to 4.2.1 ofw.
4. check on "just enter pwned DFU right now" and wait for it to finish.
5. open itunes and shift-restore with the custom 4.2.1 ipsw.
6. wait till finish and itunes will not give you any error.
,here's the screenshot of the mobile..
credits..
dev team for the solution..
www.sinfuliphone.com for the custom ipsw..
hope this helps..
,the first thing that i do is to kick it out of recovery using tiny umbrella, result is the same.
,then i restore it using 4.1 firmware with my hosts file pointing to saurik server hoping that its shsh is saved, it came out with error 1604 (as seen from the image below), darn no saved shsh..
,then i try to restore it using 4.2.1 firmware, it came out with error 1015, and the result is still the same. hmmm...maybe this was unlocked before using the update baseband option..
,i check the logs and this is what is shows..
,so my speculation has been confirmed, the baseband has been updated to 6.15 that is why restoring to 4.2.1 ofw still gives me error.
,so to quote the dev team..
WARNING — YOU DO THIS AT YOUR OWN RISK! PLEASE UNDERSTAND THE CONSEQUENCES OF UPDATING TO 06.15.
1.There is no way to come back down from 06.15, and there’s no hiding the baseband version from Apple. You’ll be voiding your warranty in a very obvious way.
2.If some future baseband comes out with a critical fix, you won’t be able to update to it if it remains down in the 05.xx sequence (then again, you wouldn’t update to it if you wanted to keep your unlock anyway).
3.Starting with FW 4.2.1 if you have 06.15 on your iPhone you won’t ever be able to restore to stock firmware (it will fail). You’ll need to only restore to custom IPSWs (then again, if you’re unlocker you should already be doing that).
,so from the number 3 quote above, to solve the problem i need to restore to a custom 4.2.1.
,so here's what i did..
1. download the custom ipsw here.
2. open redsn0w 0.9.6b6.
3. browse to 4.2.1 ofw.
4. check on "just enter pwned DFU right now" and wait for it to finish.
5. open itunes and shift-restore with the custom 4.2.1 ipsw.
6. wait till finish and itunes will not give you any error.
,here's the screenshot of the mobile..
credits..
dev team for the solution..
www.sinfuliphone.com for the custom ipsw..
hope this helps..
Friday, November 19, 2010
how to find the lock code of your nokia N900..
,,actually if you forgot your phones lock code, you have no choice but to reflash it..
,,and after you perform a reflash, still the lock will not be reset to factory default which is 12345, here's a way to find your lock code..
(credits to tmo)..
1. first download john the ripper for windows. (search in google)..
2. you must have rootsh installed on your mobile.
3. in your mobile go to terminal.
4. type sudo gainroot
5. then type..
echo root:$(grep -A 13 lock_code /dev/mtd1|tail -1):
6. it will give you the result like this..
root:63NCRYqE75Us0:
or look at the image below...
7. copy the output and put inside a txt file.
8. download and install your dl'ed john the ripper.
9. inside john the ripper, type this..
john.386 -format:DES -i:digits /path to saved file
10. your unlock code will be the result as seen on the image below..
credits goes to the tmo forum..(talk.maemo.org)
hope this helps...
Saturday, November 13, 2010
almost all NOKIA pinouts...
,i have created a program that will show some (almost all) nokia pinouts...
,i have compiled old and new pinouts available (actually what i have found from www.cpkb.org) from the web.
,say if you want to see the pinout of some old mobile..say 3310..
or some newer mobile such as nokia C5..
,you can find them in my APV viewer..
,credits of course to www.cpkb.org,digital babu for the pinouts..
,if you have newer pinouts that you want included..just leave a comment or contact me.
,my contact details are on the soft..
--------------------------------------------------------------
,software updated...
added nokia 6700slide pinout (6700s)..
download here
Monday, September 6, 2010
How to Flash Samsung Corby B3210 using usb..
,this is tutorial on how to flash your samsung Corby B3210...
files needed..
1.optiflash (download here)
2.Flash file (download here).
3.usb drivers (download Samsung New PC Studio from samsung website for the drivers).
Procedure:
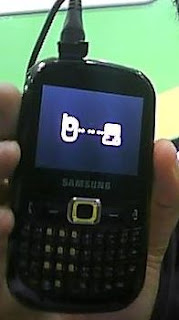
1. put your phone in Download Mode (Press * + # + Power On) and connect to PC. (take note of the com port in Device Manager)
your screen should look like this..
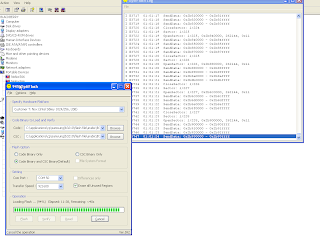
2. Open Optiflash.
3. In Specify Hardware Platform..Choose Customer T:Nox(Intel Sibley 1024/256,USB.
4. In Code: choose the .s3 flash file.
5. In CSC: choose the .csc flash file.
6. In Flash Option: Select Code Binary and CSC Binary
7. In Com Port: choose the same com port as in the Device Manager.
8. Check "Erase all Unused Regions".
9. Click Flash.
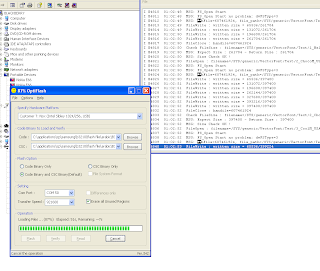
flashing screenshot..
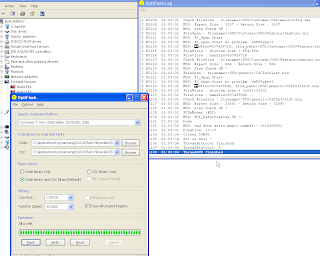
10. Wait till finish.
finished flashing screenshot..
this is the finished product.
credits to http://www.samsungfirmwareworld.com/ for the flash file and the flasher.
Tuesday, August 3, 2010
iOS 4 jailbreak tested working....
finally, the jailbreak for iOS 4 that we've been waiting has finally been released...
Comex of DevTeam has finally released a jailbreak tool that will jailbreak all iOS devices. Named JailbreakMe 2.0 aka star is a userland jailbreak that is compatible with the latest firmware of all iOS devices (except the 4.0.1 beta).
For the step by step instructions (video instructions also included) go here.
Now for the hands-on testing..
I follow the guide posted on the website above, but i cant get past the purple screen of death. So if you're stuck on the purple screen of death, here's what you do..
1. Quit Safari.
1. Put your iphone in Airplane Mode.
2. Go to Setting/Safari/Cookies Accept -- Always.
3. Clear cache and cookies.
4. open Safari and type http://jailbreakme.modmyi.com.
5. Slide to jailbreak.
6. Screen will show this. Wait till finish downloading.
7. screen will show this. wait till finish jailbreaking..
8. wait till finish.
9. finished product..
..full credits go to Comex and Dev Team for the jailbreak tool...
Thursday, July 22, 2010
iOS 4.0.1/4.0 jailbreak release may be coming out soon...
,the guy behind spirit, the userland jailbreak tool, is hinting on releasing the newest version of spirit that will jailbreak iOS 4.0 and probably 4.0.1. I maybe speculating but based on his recent tweets below..
who will not speculate?,,,
as to his suggestions of saving your shsh blobs, here is tinyumbrella for windows to save your shsh blobs.
I’m not waiting for 4.1 so I hope everyone has SHSH blobs saved. :p
SHSH blobs for 4.0.1 or 4.0 are fine; AFAIK there are no substantive differences except the bars
To be clear: if I don’t run into problems, it will work on 4.0 or 4.0.1. No need to update to 4.0.1. SHSH blobs for either are fine.
who will not speculate?,,,
as to his suggestions of saving your shsh blobs, here is tinyumbrella for windows to save your shsh blobs.
Tuesday, July 13, 2010
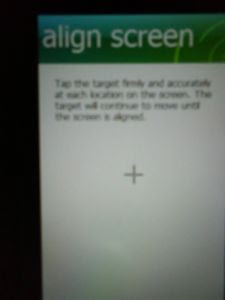
how to get out of "align screen" in omnia i900..
,yes i know, this maybe a hardware problem, but if you want to get out of the "align screen" loop on your omnia i900 after you perform a hard reset, this is how did it...
1. you must have active sync installed in your pc.
2. now power-off your phone.
3. connect your usb cable to phone and pc, then power on your mobile.
4. your mobile now will be detected and active synce will activated.
5. this is the important part, open notepad and leave the contents blank.
6. save it as "welcome.not" (without quotes and not as txt file).
7. go to active sync and click explore.
8. copy welcome.not to the mobile main memory.
9. restart phone.
that's it.. you will get past the "align screen".
hope it helps.
credits to samsung-omnia.org, modaco.com
Tuesday, July 6, 2010
jailbreak 3GS new bootrom using snowbreeze update....
this is an update of my previous post here.
Now using sn0wbreeze 1.7 from ih8sn0w.
full details below as given by ih8sn0w...
---------------------------------------------------------------------------------------
THIS TUTORIAL ASSUMES YOU ARE ALREADY ON 3.1.2!
-------
WHAT YOU WILL NEED:
* An iPhone 3G[S] -- new bootrom
* 3.1.2 already installed or 3.1.2 installed via SHSH blobs. <-- Broken blackra1n'd devices will work. (Especially if Spirit messed you up!).
* Payload Pwner-r3 for the 3GS.
* sn0wbreeze V1.7
* iBooty V1.3
* LibUSB (64-Bit users read carefully!!!)
* 3.1.2/4.0 3GS firmware downloaded.
-------
*NOTE : IF YOU HAVE THE SLEEP ISSUE, YOU WILL NEED TO RESTORE BACK TO 3.1.2 FIRST.*
STEP A : Installing LibUSB for iRecovery
Run this mini tool to detect your O/S + Arch. -- Windows + Arch. Detector
*********
WARNING : IF LIBUSB IS NOT INSTALLED PROPERLY, YOUR USB MIGHT NO LONGER WORK!
*********
Windows XP Users download this installer -- LibUSB Installer
*********
Windows Vista/7 users RUNNING 32-Bit:
* Download the installer and run it in compatibility mode for Windows XP.
*********
If you are a 64-Bit user, follow this tutorial -- LibUSB 64-Bit Tut
*********
Once LibUSB is installed iRecovery should be able to function now.
-------
STEP B : Pwning iBEC + iBoot
I : Download this easy tool here -- Payload Pwner-r3 for 3GS // It will help you create the payload + iBEC.
**SAVE THE PAYLOAD + iBEC WHERE iBooty is.**
-------
STEP C : Making a Custom IPSW
I : Download sn0wbreeze V1.7 from here -- sn0wbreeze V1.7
II : USE EXPERT MODE!
III : In General, Checkmark "Disable NOR Flash" <-- THIS IS ESSENTIAL!!!!
IV : Build it. It will be on your Desktop.
**CUSTOM BOOT LOGOS THAT ARE MADE IN sn0wbreeze WILL NOT WORK ON NEW BOOTROMS!**
*Mac Users : PwnageTool does not have this option. I don't think it will ever be in there. Use a Windows Virtual Machine or friends PC to create your firmware.*
-------
STEP D: iBooty Prep.
Most of you know of the utility iBooty that I made for Aki_nG.
It will work as long as you place all of the correct files there.
I : Download iBooty GUI here -- iBooty V1.3 and Extract it.
II : Extract your Custom IPSW created by sn0wbreeze with 7-Zip or another un-archiver.
III : Grab the kernelcache and bring it into the same folder as ibooty.
Aswell as DeviceTree from the folder "Firmware\all_flash\all_flash.n88ap.production\DeviceTree.n88ap"
IV :
* Rename your Kernel 4.0-Custom to "kernel.40"
* Rename your iBEC 4.0-Custom to "ibec.40"
* Rename your DeviceTree 4.0-Custom to "devtree.40"
======
Your folder should look like this :
- iboot.payload <-- Created with Payload Pwner.
- devtree.40 <-- Grabbed from Custom IPSW made by sn0wbreeze.
- ibec.40 <-- Created with Payload Pwner.
- irecovery.exe <-- Comes with iBooty.
- readline5.dll <-- Comes with iBooty.
- iBooty.exe <-- Comes with iBooty.
- kernel.40 <-- Grab from Custom IPSW made by sn0wbreeze.
- sn0w.img3 <-- Comes with iBooty.
- wait.img3 <-- Comes with iBooty.
======
-------
STEP E: Restoring to 4.0 + Booting
-------
*MAKE SURE YOU ARE ON 3.1.2 WHEN DOING THIS*
I : Run iBooty and Select "Prepare Device for Custom Firmware". Run the Process and if you see the image, you can proceed!
II : Now open iTunes and restore to the custom ipsw.
***WHEN DONE, YOUR DEVICE WILL GO INTO RECOVERY MODE. IT WONT BOOT.***
-------
STEP F : Booting
I : Just Re-Run iBooty and select "Boot It". If all goes well it will boot!
-------
Enjoy!
-------
Hopefully I can get a tool out there that will make all of this much easier. Of course, that only happens when I get bored from ppl msging me on Twitter =p
============
CREDITS:
============
* iPhone Dev-Team (Borrowed the iBoot payload from them =])
* msft.Guy (Helping out here and there.)
* AKi_nG (For testing everything!)
* posixninja (For his continuous help!!!)
credits to
iH8sn0w
Developer of iREB/sn0wbreeze
original source..
Sunday, July 4, 2010
Jailbreak iOS 4 on iPhone 3GS (New Bootrom).....
yep..iOS 4 on iPhone 3GS with new bootrom can now be jailbroken..but there's a catch and a procedure..full details below..
credits to ih8sn0w...
-------------------------------------------------------------------------------------
Pwning 4.0 on New Bootrom 3G[S] w/3.1.2 SHSH Blobs
I wrote this all on the road with my iPad, so sorry if there is any major Grammar errors. If anyone points out any errors, I'll fix it up. Anyways...
-------
I figured making a tool would take a bit too long. So, i'm going to write up this tutorial. It isn't recommended for regular users.
**BEFORE PROCEEDING, ENSURE THAT YOU HAVE YOUR PHONE BACKED UP!**
-------
WHAT YOU WILL NEED:
* An iPhone 3G[S] -- new bootrom
* 3.1.2 SHSH blobs.
* difrnt's iBSS grabber
* Payload Pwner-r2 for the 3GS.
* sn0wbreeze V1.6.2
* iBooty
* LibUSB (64-Bit users read carefully!!!)
* 3.1.2/4.0 3GS firmware downloaded.
-------
STEP A : Grabbing your 3.1.2 iBSS file.
Pointing your hosts :
I : If you have your shsh blobs saved on Cydia/Saurik's server then follow this tutorial. -- http://saurik.com/id/12
II : If you have it saved with TinyUmbrella, then download the GUI here. -- http://thefirmwareumbrella.blogspot.com/
-------
Restoring to grab the iBSS file.
I : Place your device in DFU.
II : Start up the iBSS/iBEC grabber.
III : Put the save folder on a new folder on your desktop.
IV : Hit "Start Monitoring".
V : Now go back to iTunes and do SHIFT + Restore. Then browse for your 3.1.2 IPSW. You will need to restore
to 3.1.2 in order to pwn 4.0.
-------
Saving your iBSS
I : After Restoring, Go to the folder that you have specified to save your iBSS file.
II : You will see folders like (Per**.tmp). Go into one of them, and you'll see a folder called "Firmware". Go there. Then go to the folder "dfu".
III : Copy the iBSS file to a safe place, then you can remove the folder created by the iBSS Grabber.
------
STEP B : Creating custom 4.0 firmware.
I : Download sn0wbreeze from http://ih8sn0w.com and create your custom 4.0 ipsw.
*Ignore the warnings after browsing for the ipsw.*
------
STEP C : Installing LibUSB for iRecovery
Run this mini tool to detect your O/S + Arch. -- Windows + Arch. Detector
*********
WARNING : IF LIBUSB IS NOT INSTALLED PROPERLY, YOUR USB MIGHT NO LONGER WORK!
*********
Windows XP Users download this installer -- LibUSB Installer
*********
Windows Vista/7 users RUNNING 32-Bit:
* Download the installer and run it in compatibility mode for Windows XP.
*********
If you are a 64-Bit user, follow this tutorial -- LibUSB 64-Bit Tut
*********
Once LibUSB is installed iRecovery should be able to function now.
-------
STEP D : Pwning iBSS + iBoot
I : Download this easy tool here -- Payload Pwner-r2 for 3GS // It will help you create the payloads.
**SAVE THE PAYLOADS WHERE iBooty is.**
-------
STEP E: iBooty Prep.
Most of you know of the utility "iBooty" that I made for Aki_nG.
It will work as long as you place all of the correct files there.
I : Download iBooty GUI here -- iBooty for 3GS and Extract it.
II : Extract your Custom IPSW created by sn0wbreeze with 7-Zip or another un-archiver.
III : Grab the kernelcache and bring it into the same folder as ibooty.
Also grab the iBEC from the folder "Firmware\dfu\iBEC.n88ap.RELEASE.dfu"
IV :
* Rename your iBSS 3.1.2 signed to "ibss312.dfu"
* Rename your Kernel 4.0-Custom to "kernel.40"
* Rename your iBEC 4.0-Custom to "ibec40.dfu"
======
Your folder should look like this :
- iboot.payload <-- Created with Payload Pwner.
- exploitibss312 <-- Created with Payload Pwner.
- ibec40.dfu <-- Grabbed from Custom IPSW made by sn0wbreeze.
- irecovery.exe <-- Comes with iBooty.
- readline5.dll <-- Comes with iBooty.
- iBooty.exe <-- Comes with iBooty.
- ibss312.dfu <-- THIS NEEDS TO BE YOUR iBSS from the restore!
- kernel.40 <-- Grab from Custom IPSW made by sn0wbreeze.
- sn0w.img3 <-- Comes with iBooty.
======
-------
STEP F: Restoring to 4.0 + Booting
-------
*MAKE SURE YOU ARE ON 3.1.2 WHEN DOING THIS*
I : Run iBooty and Select "Prepare Device for Custom Firmware". Run the Process and if you see a snow flake, you can proceed!
II : Now open iTunes and restore to the custom ipsw.
***WHEN DONE, YOUR DEVICE WILL HAVE A BLACK SCREEN AND NOT BOOT! ITS IN A DFU LOOP [THIS IS NORMAL!]***
-------
STEP G : Booting
I : Just Re-Run iBooty and select "Boot It". If all goes well it will boot!
-------
Enjoy!
-------
Hopefully I can get a tool out there that will make all of this much easier. Of course, that only happens when I get bored from ppl msging me on Twitter =p
============
CREDITS:
============
* iPhone Dev-Team (Borrowed the iBoot payload from them =])
* msft.Guy (Helping out here and there.)
* AKi_nG (For being the first to test this)
* difrnt (For iBSS Grabber)
* posixninja (For his continuous help!!!)
original source
Thursday, June 17, 2010
upgrade iphone 3Gs to 3.1.3 without upgrading baseband
here is the procedure on how to upgrade your iPhone 3Gs 3.1.2 with baseband 5.11 to 3.1.3 without upgrading the baseband.
1. first make a modified 3.1.3 ipsw using the instructions provided here.
2. shift-restore on your itunes and use the modified firmware that you created.
3. you will come up with error 6 on itunes as shown by the image below.
3a. then you phone will be in recovery mode as shown.
4. now open ireb and press fix recovery loop, then choose iphone 3Gs.
5. Now your phone will be back to normal as shown below.
6. here's the screenshot of the phone with 3.1.3 version and 5.11 baseband.
download ireb here.
Monday, June 14, 2010
Blacksn0w RC2 Unlock for iOS 4 is now out...
yep, you read it right, iOS4 can now be unlocked using Blacksn0w RC2.
but wait..there's a catch..only for 5.11 baseband..
the guy who released PushFix 2.0 for unlock 3.1.3 3GS and who released the Blacksn0w RC2 fix for 3.1.3 did it again..
read full story below..
--------------------------------------------------------------------------------------
Steve, the guy who was behind PushFix 2.0 (the first real fix for Push Notifications) for unlocked iPhones and Blacksn0w RC2 fix for iPhone 3.1.3 has just released Blacksn0w RC2 for iOS 4. This version of blacksn0w is basically a repackaged version of the original unlock released by geohot, and the binaries which were recently released by MSFT Guy for 05.11.07 baseband on iPhone 3GS, running iOS 4.0 GM (formerly iPhone OS 4).
The official description of the package is as follows.
If all those manual instructions were too hard for you to follow, you can now simply use this Blacksn0w RC2 package to get the job done. Simply follow the simple step by step guide below to unlock your iPhone 3GS on iOS 4, 05.11.07 baseband using blacksn0w RC2.
Warning Note: I have tested it and it is working. This is strictly for iPhone 3GS, with old bootrom and 05.11.07 baseband only. Also the Blacksn0w binaries are a little buggy, which will result in your phone taking at least 90 seconds on every reboot to catch carrier signals. Proceed only if you are an advanced user. Otherwise, wait for the official unlock and jailbreak tools which will be out in about two weeks time. We are not responsible if you end up bricking or locking your phone.
How to: Jailbreak iPhone 3GS on iOS 4:
Step 1: Follow the complete guide posted here to jailbreak your iPhone 3GS using PwnageTool bundles on iPhone firmware 4.0.
How to: Unlock iPhone 3GS 05.11.07 Baseband on iOS 4:
Step 2: Once you are done with the jailbreak, you can now unlock your iPhone 3GS running custom iOS 4.0 firmware by using blacksn0w RC2 from Cydia. To do this:
Start “Cydia” on your iPhone.
Touch on “Manage” tab on the bottom.
Now touch on “Sources” as seen in the screenshot below:
Touch on “Edit” and then on “Add”. You will be prompted to enter a url source as seen in the screenshot below. Type “http://cydia.pushfix.info” and touch on “Add Source”.
Cydia will now automatically update your sources by following a series of automated steps.
After installation is completed. Search for “blacksn0w RC2 for iOS 4” in Cydia and install this application. This app will automatically unlock your iPhone 3GS so that you can use it with any carrier.
Step 3: Now simply restart your iPhone. Wait for at least 90 seconds for your phone to catch signals and voila! you should now have a fully unlocked iPhone 3GS, on iOS 4. [Thanks Steve!]
credits to original author here.
but wait..there's a catch..only for 5.11 baseband..
the guy who released PushFix 2.0 for unlock 3.1.3 3GS and who released the Blacksn0w RC2 fix for 3.1.3 did it again..
read full story below..
--------------------------------------------------------------------------------------
Steve, the guy who was behind PushFix 2.0 (the first real fix for Push Notifications) for unlocked iPhones and Blacksn0w RC2 fix for iPhone 3.1.3 has just released Blacksn0w RC2 for iOS 4. This version of blacksn0w is basically a repackaged version of the original unlock released by geohot, and the binaries which were recently released by MSFT Guy for 05.11.07 baseband on iPhone 3GS, running iOS 4.0 GM (formerly iPhone OS 4).
The official description of the package is as follows.
Use on Modem Firmware 05.11.07 ONLY!
V1.2: Support for 4.0 GM. Backwards compatible to 3.1.2/3 as well. V1.1: MyWi tethering fix
Geohot’s unlock for 3.1.2/3.1.3/4.0GM on the iPhone 3GS (and probably 3G). Please donate at http://blackra1n.com/ if you enjoy.
With 3.1.3 & 4.0 GM patch (when needed) by msft.guy. Packaged by Pushfix.info
This is an unofficial release but Geohot HAS given me permission to redistribute blacksn0w. All known issues with WiFi loss and boot loops seem to be fixed. If it doesn’t work for some reason, you should still get the SpringBoard. This allows you to uninstall if necessary. It is a little slower to boot because of the increased safety of the release. A 3GS boots to cell connection established in about 90 seconds in iOS 4 now (50% slower than 3.1.X).
Improvements may be made in the future.
If all those manual instructions were too hard for you to follow, you can now simply use this Blacksn0w RC2 package to get the job done. Simply follow the simple step by step guide below to unlock your iPhone 3GS on iOS 4, 05.11.07 baseband using blacksn0w RC2.
Warning Note: I have tested it and it is working. This is strictly for iPhone 3GS, with old bootrom and 05.11.07 baseband only. Also the Blacksn0w binaries are a little buggy, which will result in your phone taking at least 90 seconds on every reboot to catch carrier signals. Proceed only if you are an advanced user. Otherwise, wait for the official unlock and jailbreak tools which will be out in about two weeks time. We are not responsible if you end up bricking or locking your phone.
How to: Jailbreak iPhone 3GS on iOS 4:
Step 1: Follow the complete guide posted here to jailbreak your iPhone 3GS using PwnageTool bundles on iPhone firmware 4.0.
How to: Unlock iPhone 3GS 05.11.07 Baseband on iOS 4:
Step 2: Once you are done with the jailbreak, you can now unlock your iPhone 3GS running custom iOS 4.0 firmware by using blacksn0w RC2 from Cydia. To do this:
Start “Cydia” on your iPhone.
Touch on “Manage” tab on the bottom.
Now touch on “Sources” as seen in the screenshot below:
Touch on “Edit” and then on “Add”. You will be prompted to enter a url source as seen in the screenshot below. Type “http://cydia.pushfix.info” and touch on “Add Source”.
Cydia will now automatically update your sources by following a series of automated steps.
After installation is completed. Search for “blacksn0w RC2 for iOS 4” in Cydia and install this application. This app will automatically unlock your iPhone 3GS so that you can use it with any carrier.
Step 3: Now simply restart your iPhone. Wait for at least 90 seconds for your phone to catch signals and voila! you should now have a fully unlocked iPhone 3GS, on iOS 4. [Thanks Steve!]
credits to original author here.
Monday, June 7, 2010
iPhone 4.0 and iPhone 3.1.3 Unlock Release Confirmed for this Month
Here we go. The waiting will finally be over.
It is now confirmed by a member of the iPhone Dev Team that full carrier unlock for iPhone OS 3.1.3 and 4.0 will be available this month.
check out the details below.
----------------------------------------------------------------------------------
We have been hearing about this one aren’t we? but what we have now is final confirmation. According to the member of iPhone Dev Team, full carrier unlocks for iPhone OS 3.1.3, and iPhone OS 4.0 will be released this month once Apple has released both the final version of iPhone OS 4, and the next iPhone 4G / HD.
----------------------------------------------------------------------------
source
It is now confirmed by a member of the iPhone Dev Team that full carrier unlock for iPhone OS 3.1.3 and 4.0 will be available this month.
check out the details below.
----------------------------------------------------------------------------------
We have been hearing about this one aren’t we? but what we have now is final confirmation. According to the member of iPhone Dev Team, full carrier unlocks for iPhone OS 3.1.3, and iPhone OS 4.0 will be released this month once Apple has released both the final version of iPhone OS 4, and the next iPhone 4G / HD.
People still ask, but sure, with both 4.0 & iPhoneHD coming out this month, so too will the 3.1.3/4.0 carrier unlocks
----------------------------------------------------------------------------
source
Thursday, June 3, 2010
camera not saving pictures in iphone solution...
problem: when you use the camera of iphone, the pictures are not saved....
solution:
requirement.
1. you must have a jailbroken iphone.
2. you must have openssh installed in your iphone.
3. you must have afc2add installed.
4. you must have diskaid installed on your pc.
instructions:
1. connect your jailbroken phone to pc.
2. open diskaid.
3. click root.
4. browse to /var/mobile/DCIM.
5. delete the folders inside.
6. done.
hope it helps..
Tuesday, June 1, 2010
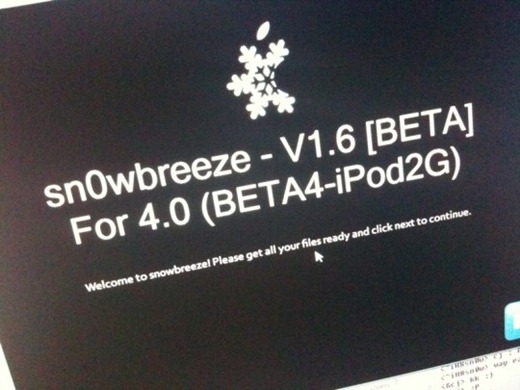
Sn0wbreeze V1.6 to Jailbreak iPhone OS 4.0
The iPhone hacker behind sn0wbreeze, f0recast and BlackBreeze today accidently put up a picture on his twitter account, showing version 1.6 of sn0wbreeze which promises to jailbreak iPod touch 2G on iPhone OS 4. The picture in question was removed quickly but the folks at The Technopath were quick enough to grab the image for everyone to see.
While there is no ETA (Estimated Time of Arrival) on the release yet, but there is no reason why it shouldn’t be soon as iPhone OS 4 is set for June 7 release at WWDC where Apple is also expected to announce the next iPhone.
original source here
While there is no ETA (Estimated Time of Arrival) on the release yet, but there is no reason why it shouldn’t be soon as iPhone OS 4 is set for June 7 release at WWDC where Apple is also expected to announce the next iPhone.
original source here
Sunday, May 30, 2010
unlock for 5.12 baseband 3.1.3 iphone coming in june
it seems that the unlock for iphone 3.1.3 with baseband 5.12 will soon be coming out...
below are the details:
While replying to a tweet, MuscleNerd of iPhone Dev Team has confirmed that an unlock for iPhone 3G/3GS on 05.12.01 baseband will be released once Apple announces the new iPhone along with final GM version of iPhone OS 4. This announcement is expected to be made at WWDC 2010 so it wont be long before we finally get our iPhones unlocked on this baseband.
The said conversation between MuscleNerd and EmmanueGT is as follows.
@MuscleNerd will there be a unlock software coming out for the 3gs 3.1.3 baseband 05.12.01 when the new iPhone 4g comes out??
@EmmanueGT yep..so don’t sell or give away your 3GS :) (at same time, remember not to accept Apple FW upgrades in future)
------------------------------------------------------------------
it seems that the unlock is imminent...
original source
Tuesday, May 25, 2010
How to flash nokia N900 with Phoenix (crack)
i know that you can flash N900 using maemo flaser, but i just want to try to flash this N900 with Phoenix(crack) for a change.
1. download Phoenix here.(credits of course to PhoenixSlayer)
2. Open Phoenix and download flash file within the Phoenix software.
3. Click Flashing/Firmware Update from menu.
3a. now flashing..
4. Wait for flashing to finish.
hope this helps...
1. download Phoenix here.(credits of course to PhoenixSlayer)
2. Open Phoenix and download flash file within the Phoenix software.
3. Click Flashing/Firmware Update from menu.
3a. now flashing..
4. Wait for flashing to finish.
hope this helps...
Sunday, May 23, 2010
How to add language to SE G700 without box/flashing..
this is the procedure on how to add language to your Sony Ericsson G700 without any box or without flashing. Applicable also to P1i,G900,W960i.
1. 1. first you must have SE PC Suite for smartphone installed and its corresponding phone drivers.
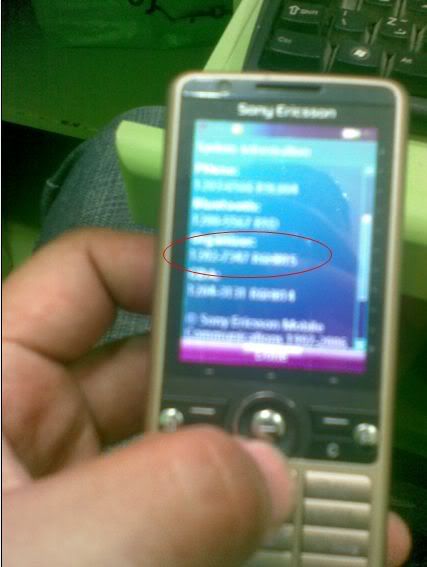
2. check the organizer version of your phone.
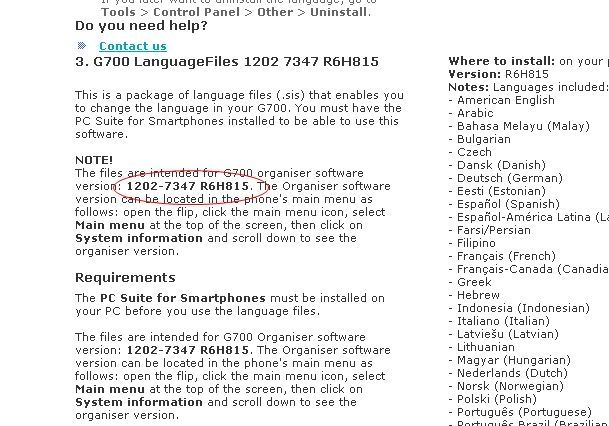
mine is 1202-7347-R6H815
3. go to this site..and look for your organizer version..like the one below and click download now.
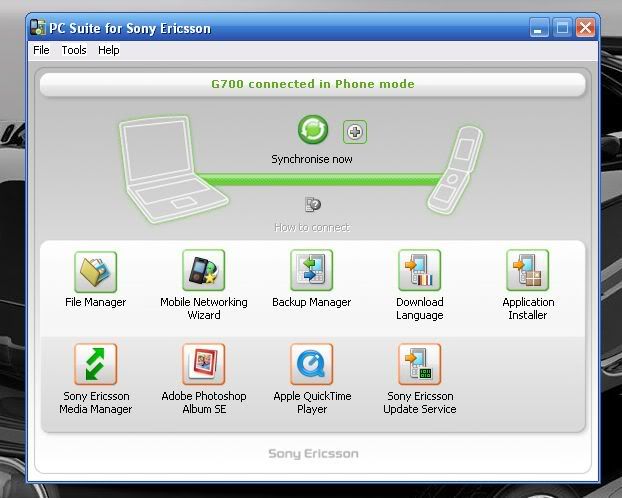
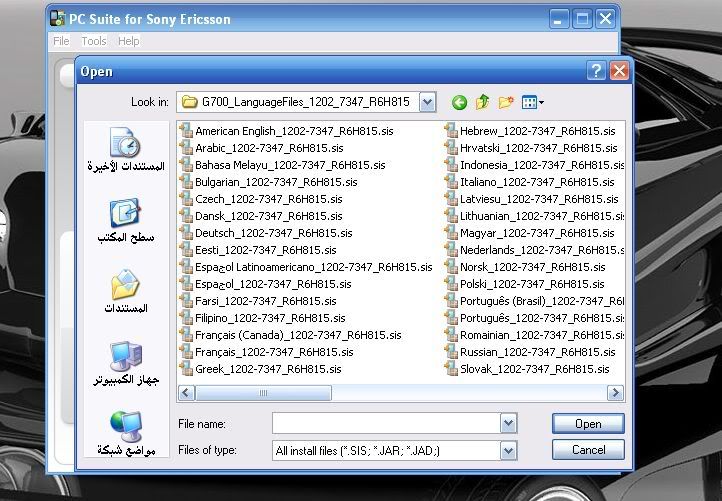
4.open SE PC Suite for smartphone and make sure phone is connected (install drivers if necessary..driver can be found at /program files/sony ericsson/sony ericsson symbian 9 drivers) and click application installer.
5. browse for language that you want to install/add.
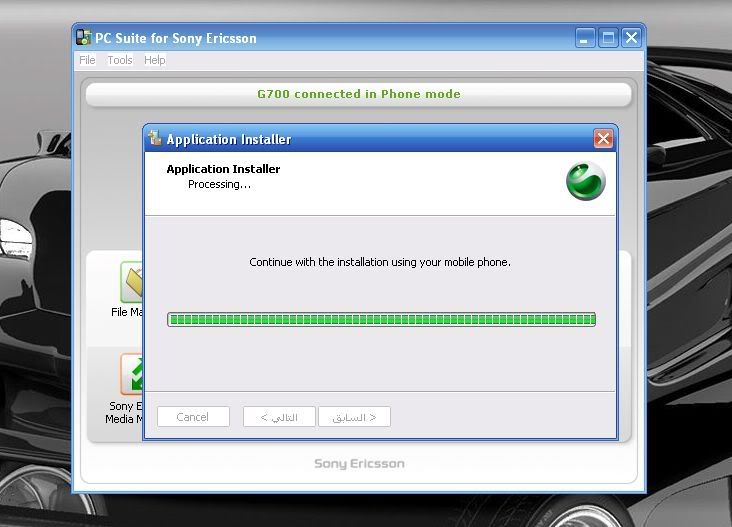
6. when you reach this point...
click install on your mobile and wait for it to finish as indicated on your pc.
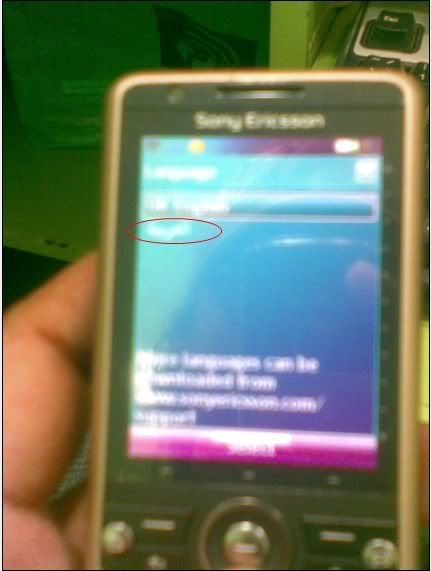
7. this is the screenshot of finished product..
DONE...
Monday, May 17, 2010
how to know if your iphone 3G or 3GS is factory unlocked (FU) or not...
i have created a program which will enable you to know if your iPhone 3G or 3Gs is factory unlocked or not based on the model of the i-Phone.
here's the screenshot..
from the screenshot,the iPhone is 3GS with model MC 131AB/A.
if the country of origin is Saudi Arabia or UAE, the carrier is Mobily for Saudi Arabia and Etisalat for UAE, then the phone is factory unlocked.
if the country of origin is Egypt with carrier as either mobinil or vodafone, or Jordan with carrier as Orange, then the phone is locked to carrier.
the information is taken from the old website of apple which has since been deleted and replaced. Luckily the old table is saved on another website from which I have taken this information.
Hope this will be of some help..
you can download softwere here.
Thursday, May 13, 2010
Preventing baseband update as a last-ditch effort
this post is from the dev team in response to the "remove cable during firmware update" solution, that has been released by andy_jpn and h4ckermyles of gsmhosting.com and gsmsandwich.com.ph respectively, that will preserve the baseband to 5.11 even after the update to 3.1.3 fw.
-------------------------------------------------------------------------------
below are the details as taken from their site.
Preventing baseband update as a last-ditch effort
What is it?
This page describes a “last-ditch” way to prevent a baseband update for those who ignored the warnings on http://spiritjb.com to not use Spirit if you're using blacksn0w on an iPhone 3GS without 3.1.2 SHSH blobs on file.
This is not a jailbreak or an unlock by itself. It's much safer than the “pull your USB cable during Firmware Update” method that's making its way around the forums (that method has the potential to brick your baseband if your timing is off).
Some people who were using blacksn0w on their iPhone 3GS at 3.1.2 tried to apply the Spirit JB without removing blackra1n despite all the warnings against this. Those who did usually found themselves in a reboot loop or stuck at the Apple or recovery screen. If they did this on an iPhone 3GS without 3.1.2 SHSH blobs on file, they got stuck with an inoperable phone. That's because restoring to stock 3.1.3 (to get out of the loop) also updates the baseband past the point where the currently released unlocks will work.
The number of iPhone 3GS jailbreakers using blacksn0w who do not have 3.1.2 SHSH hashes on file with Cydia is probably very small. Do not use this method if Cydia has your 3.1.2 SHSH hashes on file – it's overkill! Just restore to 3.1.2 using your saved hashes instead. (But if you've already got 3.1.3's baseband on your iPhone, it's already too late for you and you must wait for the next unlock. This method doesn't change that.).
When should I use this method
Only use this method if you meet *all* of these requirements:
Using an iPhone 3GS; and
No 3.1.2 SHSH blobs on file with Cydia (or locally on your computer); and
You've never updated or restored (or bought your iPhone with) stock 3.1.3 before; and
Have access to a SIM card that will allow your iPhone 3GS to activate through iTunes. This is an important requirement because if you don't meet it then this method is pointless since you won't be able to use the Spirit JB. Note that you'll only need this SIM card to activate the iPhone before running Spirit, and you don't need to keep it after that.
You're currently in a reboot loop or stuck in recovery mode. If you're not, and if the only thing you're trying to do is switch to an untethered jailbreak, then please reconsider what you're about to do. (You may want to leave well enough alone for now.)
Please consider this method a “last-ditch” way to undo your previous mistake only.
What is the method
This method “mostly” restores to 3.1.3, but makes the restore process error out at a safe point by removing the LLB image from the stock IPSW. The error will occur before the NOR is erased and before the baseband is reflashed.
1. Make sure you have rslite or iRecovery handy and that you can run it. You'll need to use it after iTunes errors out.
2. Unzip the 3.1.3 IPSW. You'll be making three changes to it.
3. Remove Firmware/all_flash/all_flash.n88ap.production/LLB.n88ap.RELEASE.img3
4. Edit Firmware/all_flash/all_flash.n88ap.production/manifest. Remove the first line (LLB.n88ap.RELEASE.img3) then save back the file.
5. Remove the two references to LLB in BuildManifest.plist. You want to remove the lines starting withLLB up to and including the next matching (this will be 17 lines).
LLB
BuildString
iBoot-636.66.33~4
Info
IsFirmwarePayload
Path
Firmware/all_flash/all_flash.n88ap.production/LLB.n88ap.RELEASE.img3
PartialDigest
QAAAADgBAQBmTeQNOchSWUN8/P56yjPVrrML
2w==
Do this removal twice…once in the first half of the file, and once in the second half.
6. Zip it all back up. Keep in mind that the top-level of the zip should be that directory where BuildManifest.plist is. (Don't zip it from the folder one level up from this by mistake).
7. Restore or update to this modified IPSW (not the stock one from Apple!). It will eventually error out (error #6).
8. Use rslite or iRecovery to get past the subsequent recovery screen. Using rslite, you'd do:
% rslite
rslite v0.2 - by the iPhone Dev Team, 2009.
--THIS IS AN UNSUPPORTED TOOL--
Connecting...
[Recovery] setenv auto-boot true
[Recovery] saveenv
[Recovery] reboot
9. Using your valid (but temporary if need be) SIM, activate the iPhone then use Spirit from http://spiritjb.com to jailbreak. Then use Cydia to install the blacksn0w unlock.
-------------------------------------------------------------------------------
below are the details as taken from their site.
Preventing baseband update as a last-ditch effort
What is it?
This page describes a “last-ditch” way to prevent a baseband update for those who ignored the warnings on http://spiritjb.com to not use Spirit if you're using blacksn0w on an iPhone 3GS without 3.1.2 SHSH blobs on file.
This is not a jailbreak or an unlock by itself. It's much safer than the “pull your USB cable during Firmware Update” method that's making its way around the forums (that method has the potential to brick your baseband if your timing is off).
Some people who were using blacksn0w on their iPhone 3GS at 3.1.2 tried to apply the Spirit JB without removing blackra1n despite all the warnings against this. Those who did usually found themselves in a reboot loop or stuck at the Apple or recovery screen. If they did this on an iPhone 3GS without 3.1.2 SHSH blobs on file, they got stuck with an inoperable phone. That's because restoring to stock 3.1.3 (to get out of the loop) also updates the baseband past the point where the currently released unlocks will work.
The number of iPhone 3GS jailbreakers using blacksn0w who do not have 3.1.2 SHSH hashes on file with Cydia is probably very small. Do not use this method if Cydia has your 3.1.2 SHSH hashes on file – it's overkill! Just restore to 3.1.2 using your saved hashes instead. (But if you've already got 3.1.3's baseband on your iPhone, it's already too late for you and you must wait for the next unlock. This method doesn't change that.).
When should I use this method
Only use this method if you meet *all* of these requirements:
Using an iPhone 3GS; and
No 3.1.2 SHSH blobs on file with Cydia (or locally on your computer); and
You've never updated or restored (or bought your iPhone with) stock 3.1.3 before; and
Have access to a SIM card that will allow your iPhone 3GS to activate through iTunes. This is an important requirement because if you don't meet it then this method is pointless since you won't be able to use the Spirit JB. Note that you'll only need this SIM card to activate the iPhone before running Spirit, and you don't need to keep it after that.
You're currently in a reboot loop or stuck in recovery mode. If you're not, and if the only thing you're trying to do is switch to an untethered jailbreak, then please reconsider what you're about to do. (You may want to leave well enough alone for now.)
Please consider this method a “last-ditch” way to undo your previous mistake only.
What is the method
This method “mostly” restores to 3.1.3, but makes the restore process error out at a safe point by removing the LLB image from the stock IPSW. The error will occur before the NOR is erased and before the baseband is reflashed.
1. Make sure you have rslite or iRecovery handy and that you can run it. You'll need to use it after iTunes errors out.
2. Unzip the 3.1.3 IPSW. You'll be making three changes to it.
3. Remove Firmware/all_flash/all_flash.n88ap.production/LLB.n88ap.RELEASE.img3
4. Edit Firmware/all_flash/all_flash.n88ap.production/manifest. Remove the first line (LLB.n88ap.RELEASE.img3) then save back the file.
5. Remove the two references to LLB in BuildManifest.plist. You want to remove the lines starting with
QAAAADgBAQBmTeQNOchSWUN8/P56yjPVrrML
2w==
Do this removal twice…once in the first half of the file, and once in the second half.
6. Zip it all back up. Keep in mind that the top-level of the zip should be that directory where BuildManifest.plist is. (Don't zip it from the folder one level up from this by mistake).
7. Restore or update to this modified IPSW (not the stock one from Apple!). It will eventually error out (error #6).
8. Use rslite or iRecovery to get past the subsequent recovery screen. Using rslite, you'd do:
% rslite
rslite v0.2 - by the iPhone Dev Team, 2009.
--THIS IS AN UNSUPPORTED TOOL--
Connecting...
[Recovery] setenv auto-boot true
[Recovery] saveenv
[Recovery] reboot
9. Using your valid (but temporary if need be) SIM, activate the iPhone then use Spirit from http://spiritjb.com to jailbreak. Then use Cydia to install the blacksn0w unlock.
Wednesday, May 12, 2010
iFixer Fix for Spirit and Blackra1n Jailbreak Users
iFixer is a new utility that will fix iTunes 9.1.x related errors when running Spirit Jailbreak for iPhone, iPad and iPod touch, or blackra1n on Windows. The program basically has two buttons: “Make it Spirit!” and “Make it ra1n!”. Clicking on each of them will solve the respective iTunes 9.1.1 related issue.
You must place iFixer.exe in the same folder as Spirit.exe or Blackra1n.exe for them to work properly. Here is a short video which explains the running procedure.
iFixer for Windows can be downloaded from here.
original source
You must place iFixer.exe in the same folder as Spirit.exe or Blackra1n.exe for them to work properly. Here is a short video which explains the running procedure.
iFixer for Windows can be downloaded from here.
original source
how to download nokia applications on ovi website using pc without using your mobile (non-OTA)
1. Go to the ovi site..http://store.ovi.com/#/applications.
2. click on the application you want to download.
3. now click on "Send to Friend"
4. you will arrive here.
5. change the "send-to-friend" to download
6. a pop up will appear like this.
7. click save.
8. done..
hope this helps.
note. you must have an account in ovi..
--------------------------------------------------------------------
update
if after step 6 you are presented with this.
it means that you are downloading a jad file.
so here's the step after you save the jad file.
1. open the jad file in notepad
2. look for the "midlet jar url:" line and copy the url (encircled in red).
3. paste the url in your browser and press enter.
4. click save.
---------------------------------------------------------------
if after step 6 you are presented with this.
it means that you are downloading a dm file.
here's the step after you save the dm file.
1. open the dm file in notepad.
2. note the "content" line it says that the application is in sisx format.
3. delete the four lines (including the blank fourth line) encircled in red, so that you will come up with this.
4. save the file with the sisx extension.
done..
hope this helps...
Subscribe to:
Posts (Atom)